Friday 25 April 2014


Wednesday 23 April 2014
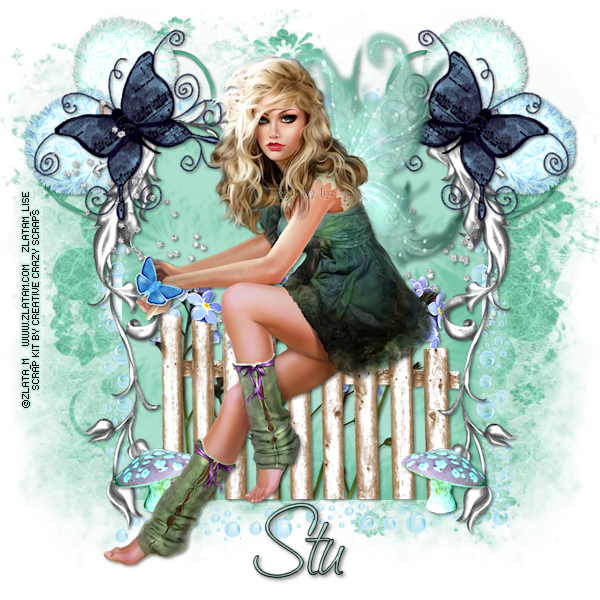
This tutorial was written by me on April 23, 2014.
It was made out of my own creation and any similarity is purely coincidental.
I used PSP X2 but any version will do.
Artist: Zlata_M
You can find this tube at Zlata_M Tubes Store HERE
Please Don't use this tube without a license.
Scrap Kit: Butterfly Dreams by Creative Crazy Scraps
This kit can be found at Creative Crazy Scraps. HERE
Mask: MPM Mask 30 HERE
Here goes:
New Raster – 800 X 800.
Open Paper 5. Open mask (MPM 30) and minimize.
SELECTIONS – SELECT ALL – Copy and paste Paper 5 into selection.
Go to LAYERS – NEW MASK LAYER – FROM IMAGE – SOURCE LUMINANCE - CHECKED – from menu, find MPM 30 – OK. Duplicate and merge down. Re-size 110%.
Lets do some elements now:
Element 18 - C/P and move to top right corner of tag. Duplicate and mirror.
(see tag for placement)
Element 22 - C/P and move to far left side of tag. Duplicate and mirror.
(see tag for placement)
Right now, I wanted to do a paper background behind what will eventually be a frame look. So I got to my SELECTION tool and grab an area almost in the middle of the tag (as seen in the screen shot below).

Next thing I do is to add a NEW RASTER LAYER. I then grab a paper, I used Paper 1, and C/Paste Into Selection (as seen in screen shot below).

Element 1 - C/P and move a bit down on tag, but leave in middle over paper layer.
(see tag for placement)
Element 28 - C/P and move a bit down, but leave in middle of tag over element 1 also over paper layer.
(see tag for placement)
Element 30 - C/P and move over and to the bottom of paper layer.
(see tag for placement)
Element 29 - C/P and move to bottom of paper layer over element 30.
(see tag for placement)
Element 39 - C/P and re-size 40%. Move to bottom right side of tag over element 28 layer. Duplicate and mirror.
(see tag for placement)
Element 34 - C/P and re-size 50%. Move to top left corner of element 28 layer. Duplicate and mirror.
(see tag for placement)
Element 10 - C/P and move up on tag.
(see tag for placement)
Now for the tube(s):
If you are using the same tube as me, grab it now. C/P and re-size 90%. Move her look like she is sitting up on element 29.
Element 2 - C/P and re-size 20%. Move to middle left side of tag over tube.
(see tag for placement)
I used:
V & H 2
Opacity 70
Blur 7
Color Black
Now you can add name and © information. Save as .png and re-size if you wish.
Save and add
name and © info.
Let me know what you think of
this tutorial.
I would love to see any results.

Here goes:
C/P and re-size 65%. Move her into position.
SELECTIONS - INVERT - DELETE - SELECTIONS - INVERT.
Duplicate the tube layer.
ADJUST – BLUR – GAUSSIAN BLUR – RADIUS 25 - OK.
Change BLEND MODE of copy of tube layer to HARD LIGHT and change the original tube layer to LUMINANCE (L) and lowered the opacity to 50%.
(see tag for placement)
Lets do some elements now:
Element 31 - C/P and move to left side of tag. Make sure this layer is UNDER all the frame layer(s). Duplicate and mirror.
(see tag for placement)
Element 28 - C/P and move to bottom left side of tag. Make sure this layer is also UNDER all frame layer(s). Duplicate and mirror.
(see tag for placement)
Element 42 - C/P and move to bottom left side of tag. Make sure this and all other layers are posted OVER all other layer(s). Duplicate and mirror.
(see tag for placement)
Element 48 - C/P and move to bottom left corner of tag.
(see tag for placement)
Element 15 - C/P and re-size 30%. Move to bottom left side of tag beside element 48.
(see tag for placement)
Element 25 - C/P and move to top middle of tag. I used a white drop shadow. Using the same settings as below but using COLOR WHITE and I did it again but changed the V & H #'s to -2.
(see tag for placement)
I place the tube layer(s) here:
If you are using the same tube as me, grab your choice of her now. C/P and mirror. Move to bottom right corner of tag.
(see tag for placement)
Add drop shadow to layers of your choosing.
I used:
V & H 2
Opacity 70
Blur 7
Color Black
Now you can add name and © information. Save as .png and re-size if you wish.
I re-size before I save and add
name and © info.
Let me know what you think of
this tutorial.
Monday 21 April 2014

This tutorial was written by me on April 21, 2014.
It was made out of my own creation and any similarity is purely coincidental.
I used PSPx2 but any version will do.
Artist: Jonathon Earl Bowser
You can find this tube at the Creative Design Outlet HERE
Please Don't use this tube without a license.
Scrap Kit: Scrap HH_TeaGarden by Hungry Hill
You can buy this kit at Creative Design Outlet HERE
Mask: WSL 84 HERE Here goes:
Let’s start with the mask layer:
New Raster – 800 X 800.
Now for the frame:
Frame 1 - C/P and re-size 75%. Move it up just a bit on tag. Make sure your frame layer is still highlighted. Grab your magic wand. Click in the middle of frame. SELECTIONS - MODIFY - EXPAND 8 pixels.
NEW RASTER LAYER - C/Paste into selection Paper 4. I then grabbed House element. C/P and re-sized it 25%, then moved it to the left side of paper layer. Then I duplicated that layer.
ADJUST – BLUR – GAUSSIAN BLUR – RADIUS 25 - OK.
Change BLEND MODE of copy of house element to HARD LIGHT and change the original element layer to MULTIPLY. Next I grabbed Arbor-seat. C/P and re-sized 10%. Move over to left side of tag. Make sure you've kept it selected.
Now grab the tube you are using. If you are using the same one(s) as me, grab it now. I used the CU here.
C/P and re-size 75%. Move her into position.
SELECTIONS - INVERT - DELETE - SELECTIONS - INVERT.
Duplicate the tube layer.
ADJUST – BLUR – GAUSSIAN BLUR – RADIUS 25 - OK.
Change BLEND MODE of copy of tube layer to HARD LIGHT and change the original tube layer to LUMINANCE (L) and lowered the opacity to 75%.
(see tag for placement)
Lets do some elements now:
Tree 2 - C/P and re-size 90%. Move to right side of tag. Make sure this layer is UNDER all the frame layer(s).
(see tag for placement)
Tree 1 - C/P and re-size 90%. Mirror and move to left side of tag. Make sure this layer is also UNDER all frame layer(s).
(see tag for placement)
Balluster - C/P and re-size 75%. Move to left side of tag. Make sure this and all other layers are OVER all other layer(s). Duplicate and mirror.
(see tag for placement)
Kitty - C/P and re-size 20%. Move to top and a bit right on top of Balluster.
(see tag for placement)
Garden 2 - C/P and re-size 15%. Move to bottom right corner of tag in front of balluster. Duplicate and mirror. Duplicate and mirror or move so that combined with garden 1 and copies cover balluster.
(see tag for placement)
Garden 1 - C/P and re-size 15%. Move to bottom left corner of tag in front of balluster and beside garden 2. Duplicate and mirror. Duplicate several more times and mirror or move so that combined with garden 2 and copies cover front of balluster
(see tag for placement)
Flutterby - C/P and re-size 15%. Move to top right inside corner of frame.
(see tag for placement)
I place the tube layer(s) here:
If you are using the same tube as me, grab her now. C/P and mirror. Move this layer just above FRAME layer and over to the bottom left side of frame.
(see tag for placement)
Add drop shadow to layers of your choosing.
I used:
V & H 2
Opacity 70
Blur 7
Color Black
Now you can add name and © information. Save as .png and re-size if you wish.
I re-size before I save and add
name and © info.
Let me know what you think of
this tutorial.
Monday 14 April 2014

This tutorial was written by me on April 14, 2014.
It was made out of my own creation and any similarity is purely coincidental.
I used PSPx2 but any version will do.
Artist: Verymany
You can find this tube at the Verymany Tube Store HERE
Please Don't use this tube without a license.
Scrap Kit: Marlene by Devilish Dezines
You can buy this kit at Scraps & Company HERE
Mask: WSL 84 HERE Here goes:
Let’s start with the mask layer:
New Raster – 900 X 900.
Open Paper 4. Open mask (WSL 84) and minimize.
SELECTIONS – SELECT ALL – Copy and paste Paper 4 into selection.
Go to LAYERS – NEW MASK LAYER – FROM IMAGE – SOURCE LUMINANCE - CHECKED – from menu, find WSL 84 – OK. Duplicate and merge down. Re-size 120%.
Now for the frame:
Cluster 3 - C/P and move down towards the bottom of tag just a little bit. Make sure your cluster frame layer is still highlighted. Grab your magic wand. Click in the middle of frame. SELECTIONS - MODIFY - EXPAND 8 pixels.
NEW RASTER LAYER - C/Paste into selection Paper 5. What I did now was to grab ELEMENT 32. C/P and move to right side of paper layer.
SELECTION - INVERT - DELETE - SELECTIONS - INVERT. Keep selected.
Now grab the tube you are using. If you are using the same one(s) as me, grab it now. I used the CU here.
C/P and re-size 80%. Move her into position.
SELECTIONS - INVERT - DELETE - SELECTIONS - INVERT.
Duplicate the tube layer.
ADJUST – BLUR – GAUSSIAN BLUR – RADIUS 25 - OK.
Change BLEND MODE of copy of tube layer to HARD LIGHT and change the original tube layer to SCREEN.
(see tag for placement)
Lets do some elements now:
Element 18 - C/P and move to left side of tag. Make sure this layer is UNDER all the frame layer(s). Duplicate and mirror then flip.
(see tag for placement)
Element 39 - C/P and move to right side of tag. Make sure this layer is also UNDER all frame layer(s).
(see tag for placement)
Element 4 - C/P and move to right side of tag OVER all other layer(s).
(see tag for placement)
Element 30 - C/P and move to far right side of tag.
(see tag for placement)
I place the tube layer(s) here:
If you are using the same tube as me, choose the look you want for her. C/P and mirror. Re-size 60%. Move to bottom middle of tag.
(see tag for placement)
Add drop shadow to layers of your choosing.
I used:
V & H 2
Opacity 70
Blur 7
Color Black
Now you can add name and © information. Save as .png and re-size if you wish.
I re-size before I save and add
name and © info.
Let me know what you think of
this tutorial.
Sunday 6 April 2014

This tutorial was written by me on April 6, 2014.
It was made out of my own creation and any similarity is purely coincidental.
I used PSPx2 but any version will do.
Artist: Deacon Black
You can find this tube at Creative Design Outlet HERE
Please Don't use this tube without a license.
Scrap Kit: ScrapLHD_IB-DeaconBlack-107-3
You can find this kit at the Creative Design Outlet HERE
Mask: MPM Mask 7 by Millie's PSP Madness HERE
Here goes:
Let’s start
with the mask layer:
New Raster – 800 X 800.
Open Paper 1. Open mask (MPM 7) and minimize.
SELECTIONS – SELECT ALL – Copy and paste Paper 1 into selection.
Go to LAYERS – NEW MASK LAYER – FROM IMAGE – SOURCE LUMINANCE - CHECKED – from menu, find MPM 7 – OK. Duplicate and merge down. Re-size 110%.
This will be the frame layer:
Frame 1 – C/P and move it up on tag. Re-size 80%. Make sure your frame layer is still highlighted. Grab your magic wand. Click in the middle of frame. SELECTIONS - MODIFY - EXPAND 8 pixels.
NEW RASTER LAYER - C/Paste into selection Paper 3. Keep selected.
Now grab the tube you are using. If you are using the same one(s) as me, grab it now. I used the CU here.
C/P and re-size 80%. Move her into position.
SELECTIONS - INVERT - DELETE - SELECTIONS - INVERT.
Duplicate the tube layer.
ADJUST – BLUR – GAUSSIAN BLUR – RADIUS 25 - OK.
Change BLEND MODE of copy of tube layer to HARD LIGHT and change the original tube layer to BURN.
(see tag for placement)
Some elements now:
Element 8 - C/P and move to upper left corner of tag. Make sure this layer is UNDER the frame layers. Duplicate and mirror.
(see tag for placement)
Element 25 - C/P and move to top right side of frame. Make sure this layer is also UNDER the frame layers. Duplicate and mirror.
(see tag for placement)
Element 19 - C/P and move to bottom left side of frame. Make sure this layer is OVER all the frame layers. All other layers will be OVER the frame layers.
(see tag for placement)
Element 30 - C/P and re-size 70%. Move to bottom middle beneath frame.
(see tag for placement)
Element 5 - C/P and re-size 40%. Move to top left corner of tag.
(see tag for placement)
Element 22 - C/P and re-size 40%. Move to bottom middle of tag over element 30.
(see tag for placement)
Element 23 - C/P and re-size 30%. Move to bottom middle right side of element 30.
(see tag for placement)
Element 21 - C/P and move to top right side of tag.
(see tag for placement)
Element 6 - C/P and mirror. Move to bottom right corner of frame.
(see tag for placement)
Element 27 - C/P and re-size 30%. Move to middle of element 6.
(see tag for placement)
Element 12 - C/P and re-size 50%. Mirror and move to left side of element 6.
(see tag for placement)
Element 26 - C/P and mirror. Move to bottom right corner of tag.
(see tag for placement)
I place the tube layer(s) here:
If you are using the same tube as me, you need to re-size the tag before you add her. Re-size the whole tag from 800 X 800 to 600 X 600. C/P and move her to bottom left corner of tag.
(see tag for placement)
Add drop shadow to layers of your
choosing.
I used
V & H 2
Opacity 70
Blur 7
Color Black
Now you can add name
and © information. Save as .png and re-size if you wish.
I re-size before I save and add
name and © info.
Let me know what you think of
this tutorial.
Saturday 5 April 2014

This tutorial was written by me on April 5, 2014.
It was made out of my own creation and any similarity is purely coincidental.
I used PSPx2 but any version will do.
Artist: Enys Guerrero
You can find this tube at Creative Design Outlet HERE
Please Don't use this tube without a license.
Scrap Kit: Devil by Devilish Designs
You can buy this kit at Scraps & Company HERE
Mask: Moonbeams and Spiderwebs Mask 14 HERE
Here goes:
New Raster – 800 X 800.
Open Paper 2. Open mask (MBSW 22) and minimize.
SELECTIONS – SELECT ALL – Copy and paste Paper 2 into selection.
Go to LAYERS – NEW MASK LAYER – FROM IMAGE – SOURCE LUMINANCE - CHECKED – from menu, find MBSW 22 – OK. Duplicate and merge down. Re-size 110%.
Now for the frame:
Cluster 4 - C/P and move down towards the bottom of tag just a little bit. Make sure your cluster frame layer is still highlighted. Grab your magic wand. Click in the middle of frame. SELECTIONS - MODIFY - EXPAND 8 pixels.
NEW RASTER LAYER - C/Paste into selection Paper 4. Keep selected.
Now grab the tube you are using. If you are using the same one as me, grab it now. C/P over cluster and then move her into position. Duplicate and move that copy under frame. SELECTIONS - INVERT - DELETE - SELECTIONS - INVERT - SELECTIONS - SELECT NONE.
Grab your magic wand again. Go to frame layer and click in the middle of frame again. Grab the eraser tool now. SELECTION - INVERT and go to original tube layer and then erase the bottom parts of tube.
(see tag for placement)
Lets do some elements now:
Element 24 - C/P and move to left side of tag. Make sure this layer is UNDER the frame layer and original tube layer. Duplicate and mirror.
(see tag for placement)
Element 12 - C/P and re-size 45%. Move to left side of tag. Make sure this layer is also UNDER the original tube layer, but over the cluster frame layer. All other layers should be under the original tube layer also. Duplicate and mirror.
(see tag for placement)
Element 10 - C/P and re-size 30%. Move to middle right side of cluster frame.
(see tag for placement)
Element 8 - C/P and re-size 20%. Move to top right side of tag. Duplicate and mirror, then flip. Move that copy to upper left side of tag.
(see tag for placement)
Element 34 - C/P and re-size 25%. Move to bottom middle of tag.
(see tag for placement)
Element 19 - C/P and Move to right middle of cluster frame. Duplicate and mirror. Should look like it is flying out of the frame from behind tube.
(see tag for placement)
Add drop shadow to layers of your choosing.
I used:
V & H 2
Opacity 70
Blur 7
Color Black
Now you can add name and © information. Save as .png and re-size if you wish.
I re-size before I save and add
name and © info.
Let me know what you think of
this tutorial.
Friday 4 April 2014

This tutorial was written by me on April 4, 2014.
It was made out of my own creation and any similarity is purely coincidental.
I used PSP X2 but any version will do.
Artist: Verymany
You can find this tube at Verymany Tubes Store HERE
Please Don't use this tube without a license.
Scrap Kit: Easter Fairy Tale 1 by Tootypup Scraps
This kit can be found at Scraps From The Heart Store. HERE
Mask: WSL 84 HERE
Here goes:
New Raster – 800 X 800.
Open Paper 6. Open mask (WSL 84) and minimize.
SELECTIONS – SELECT ALL – Copy and paste Paper 6 into selection.
Go to LAYERS – NEW MASK LAYER – FROM IMAGE – SOURCE LUMINANCE - CHECKED – from menu, find WSL 84 – OK. Duplicate and merge down. Re-size 115%.
Lets do some elements now:
Sparkly Ground 1 - C/P and re-size 50%. Move to bottom left side of tag. Duplicate and mirror. Move up just a little bit.
(see tag for placement)
Easter Tree 2 - C/P and re-size 80%. Move to middle right side of tag.
(see tag for placement)
Easter Tree 1 - C/P and re-size 90%. Move to middle left side of tag.
(see tag for placement)
Tear Leaves - C/P and re-size 70%. Move to middle right side of tag. Duplicate and mirror.
(see tag for placement)
Easter Bridge 1 - C/P and re-size 80%. Move to bottom right side of tag.
(see tag for placement)
Shroom 9 - C/P and re-size 30%. Move to bottom left side of tag in front of Easter Bridge.
(see tag for placement)
Silver Fairy 2 - C/P and re-size 30%. Sit her on the top of the Shroom.
(see tag for placement)
Butterfly 3 - C/P and re-size 15%. Move to the bottom middle of tag in front of Easter Bridge.
(see tag for placement)
Bunny Egg 2 - C/P and re-size 20%. Move to bottom right side of tag.
(see tag for placement)
Now for the tube(s):
If you are using the same tags as me, grab it now. C/P and re-size 40%. Mirror and move her to the bottom right side of tag.
I used:
V & H 2
Opacity 70
Blur 7
Color Black
Now you can add name and © information. Save as .png and re-size if you wish.
Save and add
name and © info.
Let me know what you think of
this tutorial.
I would love to see any results.
Subscribe to:
Posts
(Atom)