Search
SCRAPS BY P & A DEZIGNS . Powered by Blogger.
Labels
CT Tutorials
PTU Tutorials
Amy Maries Kits
CDO
Devilish Dezines
Arthur Crowe
Pics For Design
Ismael Rac
Alex Prihodko
Scrappin with Lil Ole Me
CT Tag
Verymany
Rieneke Designs
Alicia Mujica
HorsePlay's Pasture
CT Tags
Zlata_M
Creative Crazy Scraps
Sassi Designs
Bookworms Dezines
Enamorte
Kizzed By Kelz
Masks
Scraps N Company
Bibi's Collection
Graphics Of Fantasy
Anna Marine
Foxy Designz
Design By Joan
Kandii Popz Dezignz
Ladyhawwk Designs
Rissas Designs
Bibi Van G Kits
Enys Guerrero
Exclusive Kit
Rebel Dezines
Spazzd Art
Alehandra Vanhek
Baby Cakes Scraps
Eugene Rzhevskii
Millie's PSP Madness Templates
MistyLynn Creations
Sandy's Designs
Bibi's Creation
FTU Tutorials
Scraps From The Heart
Twilight Scraps
Wicked Creationz Scraps
2013 Water Gun
ACDiva's
BLT Dezignz
Bibi's Creations
Cluster Frames
Kandi Kissez Template
Schnegge Scraps
Snags
Treasured Scraps
WD Designz
Alehandra Vanhak
Animated
Dave Nestler
Deacon Black
Dzines From The Heart
JT's Designs
Lily Rose Designs
Lizquis Scraps
Mashi
MediEvil Creations
Rainbow Pixie Stick Scraps
Sweet Pinup
Tammy Kat Dezigns
Templates
Vicki's Scraps
Wicked Creations Scraps
Wicked Little Cupcake
Followers
Forums I'm a member of
Tuesday 31 December 2013
This tutorial was written by me on December 31, 2013.
It was made out of my own creation and any similarity is purely coincidental.
I used PSPx2 but any version will do.
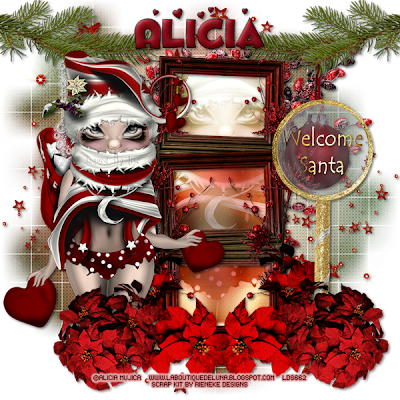
Artist: Alicia Mujica
You can find this tube at La Boutique De Luna HERE
Please Don't use this tube without a license.
Scrap Kit: My Best Wishes by Alicia Mujica
You can buy this kit at La Boutique De Luna HERE
Here goes:
New Raster – 800 X 800.
Open Papel3. Open mask and minimize.
SELECTIONS – SELECT ALL – Copy and paste Papel3 into selection.
Go to LAYERS – NEW MASK LAYER – FROM IMAGE – SOURCE LUMINANCE - CHECKED – from menu, find WSL 84 – OK. Duplicate and merge down. Re-size 115%.
Lets do some elements now:
Estrellas - C/P and re-size 45%. Move to left side of tag. Duplicate and mirror.
(see tag for placement)
Luna - C/P and re-size 60%. Move to left side of tag.
(see tag for placement)
Relo - C/P and re-size 40%. Move to middle left side of tag. Duplicate and move to right side of tag.
(see tag for placement)
Brindis - C/P re-size 70%. Move to left side of tag. Duplicate and mirror.
(see tag for placement)
Negro - C/P and re-size 30%. Move to middle right side of tag. Free rotate 30º right.
(see tag for placement)
Blanco - C/P and re-size 30%. Move to middle left side of tag. Free rotate 30º left.
(see tag for placement)
Dorado - C/P and re-size 30%. Move to middle of tag over Negro and Blanco.
(see tag for placement)
Oso - C/P and re-size 30%. Move to bottom left side of tag.
(see tag for placement)
Now for the tube(s):
If you are using the same tube as me, C/P and re-size 40%. Move to lower middle, but just a tad to the right side of tag.
(see tag for placement)
Add drop shadow to layers of your choosing.
I used:
V & H 2
Opacity 70
Blur 7
Color Black
Now you can add name and © information. Save as .png and re-size if you wish.
I re-size before I save and add
name and © info.
Let me know what you think of
this tutorial.
Monday 30 December 2013
This tutorial was written by me on December 30, 2013.
It was made out of my own creation and any similarity is purely coincidental.
I used PSPx2 but any version will do.
Artist: Arthur Crowe
You can find this tube at Arthur Crowe's Factory HERE
Please Don't use this tube without a license.
Scrap Kit: Beautiful Year by Irish Princess Designs
You can buy this Exclusive kit at Arthur Crowe's Factory HERE
Here goes:
New Raster – 800 X 800.
Open Paper 12. Open mask (WSL 84) and minimize.
SELECTIONS – SELECT ALL – Copy and paste Paper 12 into selection.
Go to LAYERS – NEW MASK LAYER – FROM IMAGE – SOURCE LUMINANCE - CHECKED – from menu, find WSL 84 – OK. Duplicate and merge down. Re-size 115%.
We are gonna play with an element here:
Open Moon Element - C/P and move to top right corner of tag.
SELECTIONS - SELECT ALL - FLOAT - DE-FLOAT. Now grab the tube you are using. If you are using the same one as me, grab it now. C/P and move her into position. SELECTIONS - INVERT - DELETE - SELECTIONS - INVERT.
Keep selected. Duplicate the tube layer.
ADJUST – BLUR – GAUSSIAN BLUR – RADIUS 25 - OK.
Change BLEND MODE of copy of tube layer to HARD LIGHT and change the original tube layer to SCREEN.
(see tag for placement)
Lets do some elements now:
Firework - C/P and move to top left corner of tag. Make sure this layer is UNDER the Moon layers. Duplicate and mirror.
(see tag for placement)
Fireworks - C/P and move to upper right side of tag. Make sure this layer is also under the Moon layers. Duplicate and mirror.
(see tag for placement)
Streamers - C/P move to top left side of tag but right of Firework. Make sure this layer is OVER the moon layers. Duplicate and mirror.
(see tag for placement)
Clock - C/P and re-size 40%. Move to bottom middle, but a tag right on tag.
(see tag for placement)
Champagne - C/P and re-size 70%. Move to bottom right corner of tag.
(see tag for placement)
Glass - C/P and re-size 40%. Move to bottom right corner but on the left side of Champagne layer.
(see tag for placement)
Bubbles - C/P and re-size 40%. Move to middle right side of tag over Glass layer so it looks like it is bubbling out of glass. Duplicate this layer and merge down.
(see tag for placement)
We are gonna place the tube now:
If you are using the same tube as me, C/P and re-size 70%. Move to lower left side of tag. C/P Limo element and move to the bottom and a bit left on tag. Make sure this layer is OVER tube layer.
(see tag for placement)
Add drop shadow to layers of your choosing.
I used:
V & H 2
Opacity 70
Blur 7
Color Black
Now you can add name and © information. Save as .png and re-size if you wish.
I re-size before I save and add
name and © info.
Let me know what you think of
this tutorial.
Sunday 29 December 2013
"Celebration Girl" - Available from 12/29 -12/31.
Spend any $$ in store and get this awesome special layer tube.
She is not just for 2014, she also has blank layers for you to add your own text
This awesome tube is available for a limited time only so hurry on over to Rac's store and
spend any amount of money and add her to your cart for FREE!!
Monday 16 December 2013

This tutorial was written by me on December 16, 2013.
It was made out of my own creation and any similarity is purely coincidental.
I used PSPx2 but any version will do.
Artist: Alicia Mujica
You can find this tube at La Boutique De Luna HERE
This is tube is not sold alone, it is part of a pack,
but she does have other tubes that would fit.
Please Don't use this tube without a license.
Scrap Kit: Romantic Christmas by Rieneke Designs
You can buy this kit at Twilight Scraps HERE
Here goes:
New Raster – 800 X 800.
Open Paper 7. Open mask and minimize.
SELECTIONS – SELECT ALL – Copy and paste Paper 7 into selection.
Go to LAYERS – NEW MASK LAYER – FROM IMAGE – SOURCE LUMINANCE - CHECKED – from menu, find WSL 84 – OK. Duplicate and merge down. Re-size 115%.
Now for the frame:
Element 50 - C/P and re-size 50%. Make sure your frame layer is highlighted. Grab your magic wand. Click in the middle of the frame layer.
Go to SELECTIONS - MODIFY - EXPAND 8 PIXELS - INVERT.
C/Paste into selection Paper 3. Keep selected.
Now grab the tube you are using. If you are using the same one as me, grab it now. C/P and move her into position.
SELECTIONS - INVERT - DELETE - SELECTIONS - INVERT. Duplicate the tube layer.
ADJUST – BLUR – GAUSSIAN BLUR – RADIUS 25 - OK.
Change BLEND MODE of copy of tube layer to HARD LIGHT and change the original tube layer to OVERLAY.
(see tag for placement)
Lets do some elements now:
Element 40 - C/P and move to bottom right corner of tag. Make sure this layer is UNDER frame layers. Duplicate and mirror then flip.
(see tag for placement)
Element 27 - C/P and and move to upper right side of tag. Make sure this layer is under the frame layers.
(see tag for placement)
Element 9 - C/P and re-size 70%. Move to top left side of tag. Make sure this layer is under frame layers. Duplicate and mirror.
(see tag for placement)
Element 48 - C/P and move to right side of frame layer. Make sure this layer is OVER the frame layer. Duplicate and mirror.
(see tag for placement)
Element 34 - C/P and re-size 50%. Move to bottom right corner of frame. Make sure this layer is over frame layer.
(see tag for placement)
Element 95 - C/P and move to bottom right side of tag beside frame.
(see tag for placement)
Element 24 - C/P and re-size 40%. Move to bottom left side of tag. Duplicate and mirror.
(see tag for placement)
Now for the tube(s):
If you are using the same tube as me, C/P and re-size 40%. Move to lower left side of tag. Move this layer UNDER element 24 layer.
(see tag for placement)
Add drop shadow to layers of your choosing.
I used:
V & H 2
Opacity 70
Blur 7
Color Black
Now you can add name and © information. Save as .png and re-size if you wish.
I re-size before I save and add
name and © info.
Let me know what you think of
this tutorial.

Sunday 15 December 2013
This tutorial was written by me on December 15, 2013.
It was made out of my own creation and any similarity is purely coincidental.
I used PSPx2 but any version will do.
Artist: Arthur Crowe
You can find this tube at Arthur Crowe's Factory HERE
Please Don't use this tube without a license.
Scrap Kit: Romantic Christmas by Rieneke Designs
You can buy this kit at Twilight Scraps HERE
Here goes:
New Raster – 800 X 800.
Open Paper 15. Open mask and minimize.
SELECTIONS – SELECT ALL – Copy and paste Paper 15 into selection.
Go to LAYERS – NEW MASK LAYER – FROM IMAGE – SOURCE LUMINANCE - CHECKED – from menu, find WSL 116 – OK. Duplicate and merge down.
Now for the frame:
Element 20 - C/P and move up and a little to the right. Make sure your frame layer is the highlighted layer. Grab your magic wand. Click in the middle of the frame layer.
Go to SELECTIONS - MODIFY - EXPAND 8 PIXELS - INVERT.
C/Paste into selection Paper 10. Keep selected.
Now grab the tube you are using. If you are using the same one as me, grab it now. C/P and move her into position.
Duplicate and move the copy layer under frame layer.
SELECTIONS - INVERT - DELETE - SELECTIONS - SELECT NONE.
Grab your magic wand again. Highlight the frame layer again. Click inside frame. Got to SELECTIONS - INVERT. Now grab your eraser tool. Highlight your original tube layer. Erase bottom of tube.
SELECTIONS - SELECT NONE.
(see tag for placement)
Lets do some elements now:
Element 4 - C/P and re-size 50%. Move to upper left corner of frame under original tube layer. Duplicate and mirror.
(see tag for placement)
Element 63 - C/P and re-size 45%. Move to to upper right corner of frame under original tube layer. Duplicate and mirror.
(see tag for placement)
Element 14 - C/P and re-size 80%. Move to bottom left side of frame under original tube layer. Duplicate and mirror.
(see tag for placement)
Element 74 - C/P and re-size 30%. Move to bottom middle of frame under original tube layer.
(see tag for placement)
Element 28 - C/P and re-size 50%. Move to bottom left side of frame under original tube layer.
(see tag for placement)
Element 61 - C/P and re-size 50%. Move to bottom right side of frame under original tube layer.
(see tag for placement)
Element 3 - C/P and re-size 30%. Move to bottom left corner of frame under original tube layer.
(see tag for placement)
Element 8 - C/P and re-size 30%. Move to bottom left but to the right of element 3 under original frame layer.
(see tag for placement)
Element 7 - C/P and re-size 30%. Move to bottom right corner of tag under original frame layer.
(see tag for placement)
Element 5 - C/P and re-size 30%. Move to bottom right side but to the left under original tube layer.
(see tag for placement)
Element 10 - C/P and re-size 80%. Move to very top left side of tag. Duplicate and mirror. Make it look like all one piece.
(see tag for placement)
Add drop shadow to layers of your choosing.
I used:
V & H 2
Opacity 70
Blur 7
Color Black
Now you can add name and © information. Save as .png and re-size if you wish.
I re-size before I save and add
name and © info.
Let me know what you think of
this tutorial.
Saturday 14 December 2013

This tutorial was written by me on December 14, 2013.
It was made out of my own creation and any similarity is purely coincidental.
I used PSPx2 but any version will do.
Artist: Ismael Rac
You can find this tube at XeracX Store HERE
Please Don't use this tube without a license.
Scrap Kit: 2013 Warm Attitude by Wicked Creationz
You can buy this exclusive kit at the XeracX Store HERE
Here goes:
New Raster – 800 X 800.
Open PP 9. Open mask and minimize.
SELECTIONS – SELECT ALL – Copy and paste PP9 into selection.
Go to LAYERS – NEW MASK LAYER – FROM IMAGE – SOURCE LUMINANCE - CHECKED – from menu, find WSL 84 – OK. Duplicate and merge down. Re-size 115%.
Now for the frame:
Element 27 - C/P and move up and to the right just a little. Make sure it is the highlighted layer. Grab your magic wand. Click in the middle of the frame layer.
Go to SELECTIONS - MODIFY - EXPAND 8 PIXELS - INVERT.
Open New Raster Layer. C/Paste into selection PP2. Keep selected.
Now grab the tube you are using. If you are using the same one as me, grab it now. C/P and move her into position.
SELECTIONS - INVERT - DELETE - SELECTIONS - INVERT.
Duplicate the tube layer.
ADJUST – BLUR – GAUSSIAN BLUR – RADIUS 25 - OK.
Change BLEND MODE of copy of tube layer to HARD LIGHT and change the original tube layer to SCREEN.
(see tag for placement)
Lets do some elements now:
Element 1 - C/P and move to upper left side of tag. Make sure this layer is under the frame layers.
(see tag for placement)
Element 22 - C/P and move to bottom left corner of tag. Make sure this layer is under the frame layer.
(see tag for placement)
Element 10 - C/P and re-size 60%. Move to top right side over frame layer.
(see tag for placement)
Element 23 - C/P and move to bottom middle of frame layer.
(see tag for placement)
Element 24 - C/P and move to bottom right corner of tag. Mirror this layer.
(see tag for placement)
Element 13 - C/P and re-size 80%. Move to bottom right corner of tag.
(see tag for placement)
Element 12 - C/P and and re-size 80%. Move to bottom right corner on left side of Element 13 layer.
(see tag for placement)
Element 2 - C/P and re-size 70%. Move to bottom right side of tag in front of both Element 12 and 13.
(see tag for placement)
Now for the tube(s):
If you are using the same tube as me, C/P and re-size 45%. Mirror and move to bottom left side of tag.
(see tag for placement)
Add drop shadow to layers of your choosing.
I used:
V & H 2
Opacity 70
Blur 7
Color Black
Now you can add name and © information. Save as .png and re-size if you wish.
I re-size before I save and add
name and © info.
Let me know what you think of
this tutorial.
Friday 13 December 2013

This tutorial was written by me on December 12, 2013.
It was made out of my own creation and any similarity is purely coincidental.
I used PSPx2 but any version will do.
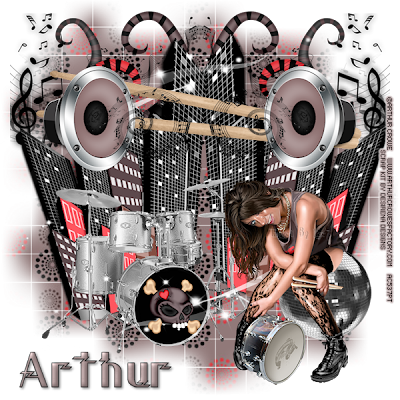
Artist: Arthur Crowe
You can find this tube at Arthur Crowe's Factory Store HERE
Please Don't use this tube without a license.
Scrap Kit: Drums Girl by Desirena Designs
This exclusive kit can be found at Arthur Crowe's Factory HERE
Here goes:
Open P 5. Open mask (WSL 84) and minimize.
SELECTIONS – SELECT ALL – Copy and paste P 5 into selection.
Go to LAYERS – NEW MASK LAYER – FROM IMAGE – SOURCE LUMINANCE - CHECKED – from menu, find WSL 84 – OK. Duplicate and merge down. Re-size 115%.
(see tag for placement)
Element 5 – C/P Move to upper left corner of tag. Duplicate and mirror.
(see tag for placement)
Element 13 – C/P and move up just a little bit on the tag.
(see tag for placement)
Element 2 - C/P move to lower left side of tag.
(see tag for placement)
Element 26 - C/P and move to the upper middle of tag. Duplicate, mirror then flip. Move element up and to the right just a little.
(see tag for placement)
Element 7 – C/P and re-size 40%. Mirror and move to lower middle of tag in front of element 2.
(see tag for placement)
Element 1 – C/P and re-size 85%. Move to upper middle of tag over element 13.
(see tag for placement)
Element 14 – C/P and re-size 50%. Move to lower right side of tag beside element 2
(see tag for placement)
Element 3 - C/P and move to upper right side of tag. Duplicate and mirror.
(see tag for placement)
Element 4 - C/P and re-size 40%. Move to upper right side in the middle of Element 3. Duplicate and mirror.
(see tag for placement)
I'll place the tube layer now:
If you are using the same tube as me, grab your the version you want to use now. C/P and re-size 45%. Move to bottom right side of tag and have her sitting on the mirror ball.
(see tag for placement)
(see tag for placement)
Element 3 - C/P and move to upper right side of tag. Duplicate and mirror.
(see tag for placement)
Element 4 - C/P and re-size 40%. Move to upper right side in the middle of Element 3. Duplicate and mirror.
(see tag for placement)
I'll place the tube layer now:
If you are using the same tube as me, grab your the version you want to use now. C/P and re-size 45%. Move to bottom right side of tag and have her sitting on the mirror ball.
(see tag for placement)
Add drop shadow to layers of your
choosing.
I used
V & H 2
Opacity 70
Blur 7
Color Black
Now you can add name and © information. Save as .png and re-size if you wish.
I used
V & H 2
Opacity 70
Blur 7
Color Black
Now you can add name and © information. Save as .png and re-size if you wish.
I re-size before I save and add
name and © info.
Let me know what you think of
this tutorial.
Subscribe to:
Posts
(Atom)
My TOU
All things I provide on this blog are my own creation.
The tutorials here are merely guidelines and you are perfectly welcome to do your own thing.
Any resemblance to others is strictly coincidence.
Please do not share.
Do not claim as yours.
If you use any items here please link back to my blog.
No translations of my tutorials.The tutorials here are merely guidelines and you are perfectly welcome to do your own thing.
All links were current and available at the time of their posting. I cannot control who comes and goes, so if you find a broken link, please use a suitable replacement item.
Feel free to send me anything that you make with my stuff and I will gladly showcase it. My email is merrittlise@gmail.com
Talk to Me
Archives
-
▼
2013
(267)
-
▼
December
(20)
- PTU Happy New Year
- PTU Beautiful Year
- AWESOME RAC SPECIAL
- PTU I Love Christmas
- PTU Romantic Christmas
- PTU 2013 Warm Attitude
- PTU Drums Girl 2
- PTU Drums Girl
- PTU Making Memories
- PTU Cowgirl Redux
- PTU Goga
- PTU Christmas Cheer
- CT Tags for Bookworm Dezines using the gorgeous *W...
- PTU Rudolph
- PTU Christie
- CT Tag done for Roman Zaric using his tube Odesa
- PTU Red Hood
- CT Tags for Sassi Designs using Spring Days
- PTU 2013 Sexy N Bad
- PTU Cupcake 2
-
▼
December
(20)


