Showing posts with label Rachel Anderson. Show all posts
Showing posts with label Rachel Anderson. Show all posts
Tuesday, 5 May 2015

PTU Opalite Mystique
This tutorial was written by me on May 5, 2015.
It was made out of my own creation and any similarity is purely
coincidental.
I used PSP X6 but any version would work.
Artist: Rachel Anderson
You can find this tube at Creative Design Outlet HERE & HERE
Scrap Kit: Magical Moments by Creative Crazy Scraps
You can find this kit at Creative Crazy Scraps Store HERE
You can find this kit at Creative Crazy Scraps Store HERE
Mask: WSL 3 HERE
Let’s start with the mask layer:
New Raster – 800 X 800.
Open Paper 2. Open mask (WSL 3) and minimize.
SELECTIONS – SELECT ALL – Copy and paste Paper 2 into selection.
Go to LAYERS – NEW MASK LAYER – FROM IMAGE – SOURCE LUMINANCE - CHECKED – from menu, find WSL 3 – OK.
Duplicate and merge down.
(see tag for placement)
Let’s start with the mask layer:
New Raster – 800 X 800.
Open Paper 2. Open mask (WSL 3) and minimize.
SELECTIONS – SELECT ALL – Copy and paste Paper 2 into selection.
Go to LAYERS – NEW MASK LAYER – FROM IMAGE – SOURCE LUMINANCE - CHECKED – from menu, find WSL 3 – OK.
Duplicate and merge down.
(see tag for placement)
Element 46 - C/P and move to upper left corner of tag. Make sure this layer is UNDER the frame layer(s). Duplicate and mirror.
I've used
V & H 2
Opacity 70
Blur 7
Color Black
Now you can add name
and © information. Save as .png and re-size if you wish.
I re-size before I add
name and © info and then save.
Let me know what you think of
this tutorial.
Sunday, 5 October 2014
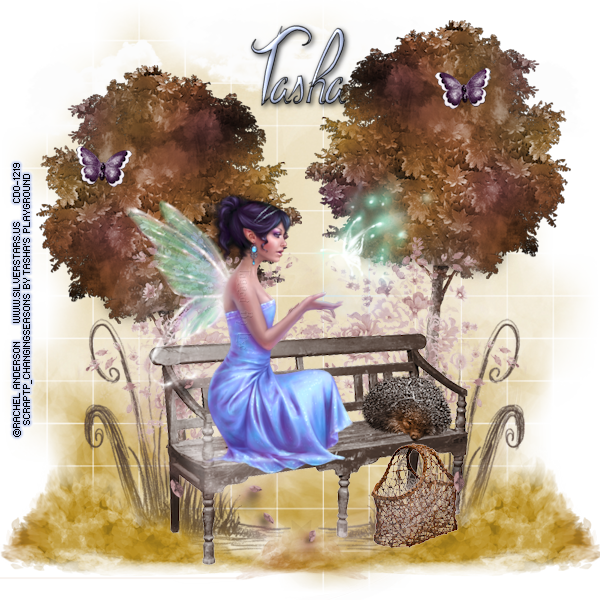
This tutorial was written by me on October 5, 2014.
It was made out of my own creation and any similarity is purely coincidental.
I used PSP X2 but any version will do.
Artist:Rachel Anderson
I bought this tube at Creative Design Outlet HERE
Do not use this tube
unless you have a license.
Scrap Kit: ScrapTP_ChangingSeasons
You can find this kit by Tasha's Playground at Creative Design Outlet HERE
Mask: WSL 84 HEREYou can find this kit by Tasha's Playground at Creative Design Outlet HERE
Here goes:
Element 14 - C/P and move to upper right corner of tag. Duplicate and mirror.
(see tag for placement)
Element 64 - C/P and re-size 85%. Move to far left side of tag. Duplicate and mirror.
(see tag for placement)
Element 13 - C/P and re-size 75%. Move to just about the bottom right corner of tag. Duplicate and mirror.
(see tag for placement)
Element 30 - C/P and move to bottom left corner. Duplicate and mirror.
(see tag for placement)
Element 29 - C/P and keep in the middle but move to the lower part of tag.
(see tag for placement)
Element 34 - C/P and re-size 85%. Move to bottom middle of tag.
(see tag for placement)
Element 51 - C/P and re-size 50%. Move to lower right side of tag and have it sitting on the right corner of element 34.
(see tag for placement)
Element 3 - C/P and re-size 30%. Move to top right corner of tag over element 64. Duplicate and mirror, then move down a bit.
(see tag for placement)
Element 19 - C/P and re-size 35%. Move to bottom right side of tag in front of element 34 and below element 51.
(see tag for placement)
Element 54 - C/P and move to bottom middle of tag. Then move a bit to the left side of element 34.
(see tag for placement)
Now for the tube(s):
If you are using the same tube as me, grab it now. C/P and re-size 75%. Place it like it is sitting on element 34. I also snagged the butterfly. I C/P and re-sized 75%. Moved it so it is sitting just over the hand of the tube.
(see tag for placement)
I used:
V & H 2
Opacity 70
Blur 7
Color Black
Now you can add name and © information. Save as .png and re-size if you wish.
(see tag for placement)
Element 64 - C/P and re-size 85%. Move to far left side of tag. Duplicate and mirror.
(see tag for placement)
Element 13 - C/P and re-size 75%. Move to just about the bottom right corner of tag. Duplicate and mirror.
(see tag for placement)
Element 30 - C/P and move to bottom left corner. Duplicate and mirror.
(see tag for placement)
Element 29 - C/P and keep in the middle but move to the lower part of tag.
(see tag for placement)
Element 34 - C/P and re-size 85%. Move to bottom middle of tag.
(see tag for placement)
Element 51 - C/P and re-size 50%. Move to lower right side of tag and have it sitting on the right corner of element 34.
(see tag for placement)
Element 3 - C/P and re-size 30%. Move to top right corner of tag over element 64. Duplicate and mirror, then move down a bit.
(see tag for placement)
Element 19 - C/P and re-size 35%. Move to bottom right side of tag in front of element 34 and below element 51.
(see tag for placement)
Element 54 - C/P and move to bottom middle of tag. Then move a bit to the left side of element 34.
(see tag for placement)
Now for the tube(s):
If you are using the same tube as me, grab it now. C/P and re-size 75%. Place it like it is sitting on element 34. I also snagged the butterfly. I C/P and re-sized 75%. Moved it so it is sitting just over the hand of the tube.
(see tag for placement)
I used:
V & H 2
Opacity 70
Blur 7
Color Black
Now you can add name and © information. Save as .png and re-size if you wish.
Save and add
name and © info.
Let me know what you think of
this tutorial.
I would love to see any results.
Wednesday, 4 June 2014

This tutorial was written by me on June 4, 2014.
It was made out of my own creation and any similarity is purely coincidental.
I used PSPx2 but any version will do.
Artist: Rachel Anderson
You can find this tube at Creative Design Outlet HERE
Please Don't use this tube without a license.
Scrap Kit: ScrapBCS_IB-RachelAnderson-18-2 by Babycakes Scraps
You can buy this kit at Creative Design Outlet HERE
Mask: WSL 84 HERE
Here goes:
New Raster – 800 X 800.
Open Paper 5. Open mask (WSL 84) and minimize.
SELECTIONS – SELECT ALL – Copy and paste Paper 5 into selection.
Go to LAYERS – NEW MASK LAYER – FROM IMAGE – SOURCE LUMINANCE - CHECKED – from menu, find WSL 84 – OK. Duplicate and merge down. Re-size 110%.
Now for the frame:
Element 19 - C/P and leave it where it lands. Make sure your frame layer is still highlighted. Grab your magic wand. Click in the middle of frame. SELECTIONS - MODIFY - EXPAND 8 pixels.
NEW RASTER LAYER - C/Paste into selection Paper 2. Keep selected.
Now grab the tube you are using. If you are using the same one as me, grab it now. C/P over frame and then move her into position. Duplicate and move the copy under frame. SELECTIONS - INVERT - DELETE - SELECTIONS - INVERT - SELECTIONS - SELECT NONE.
Grab your magic wand again. Go to frame layer and click in the middle of frame again. Grab the eraser tool now. SELECTION - INVERT and go to original tube layer and then erase the bottom parts of tube you don't want.
Element 32 - C/P and move over paper layer. Re-size 50% and move to top of paper layer. Duplicate and mirror, then flip.
(see tag for placement)
Lets do some elements now:
Element 11 - C/P and move to top right side of tag. Make sure this layer is UNDER the frame layer and original tube layer. Duplicate and mirror.
(see tag for placement)
Element 5 - C/P and move to top left side of tag. Make sure this layer is also UNDER the frame layer. Duplicate and mirror then flip.
(see tag for placement)
Element 15 - C/P and move to bottom of from. Make sure this layer is OVER the frame layer(s). All other layers will be over the frame layer too.
(see tag for placement)
Element 25 - C/P and re-size 30%. Mirror and move to top right side of frame.
(see tag for placement)
Element 12 - C/P and re-size 50%. Move to bottom right corner of frame. Duplicate and mirror.
(see tag for placement)
Element 4 - C/P and re-size 70%. Move to bottom middle of tag over element 15.
(see tag for placement)
Element 31 - C/P and move to bottom middle of tag.
(see tag for placement)
Element 23 - C/P and move to top right corner of tag. Mirror.
(see tag for placement)
Add drop shadow to layers of your choosing.
I used:
V & H 2
Opacity 70
Blur 7
Color Black
Now you can add name and © information. Save as .png and re-size if you wish.
I re-size before I save and add
name and © info.
Let me know what you think of
this tutorial.
Sunday, 13 October 2013

This tutorial was written by me on October 13, 2013.
It was made out of my own creation and any similarity is purely coincidental.
I used PSPx2 but any version will do.
Artist: Rachel Anderson
You can find this Titania tube at Creative Design Outlet HERE
Please Don't use this tube without a license.
Scrap Kit: Pretty Princess by Amy Marie's Kits
You can buy this kit at the HERE
Mask: WSL 284 HERE
Font: Precious Font HERE
Here goes:
New Raster – 800 X 800.
Open PP7. Open mask and minimize.
SELECTIONS – SELECT ALL – Copy and paste PP7 into selection.
Go to LAYERS – NEW MASK LAYER – FROM IMAGE – SOURCE LUMINANCE - CHECKED – from menu, find WSL 284 – OK. Duplicate and merge down.
SELECTIONS – SELECT ALL – Copy and paste PP7 into selection.
Go to LAYERS – NEW MASK LAYER – FROM IMAGE – SOURCE LUMINANCE - CHECKED – from menu, find WSL 284 – OK. Duplicate and merge down.
Now for the frame:
Element 42 - C/P and move a little up and a little right. Highlight your frame layer now. Grab your magic wand. Click in the middle of the frame layer.
Go to SELECTIONS - MODIFY - EXPAND 8 PIXELS - INVERT.
C/Paste into selection PP2. Keep selected.
Now grab the tube you are using. If you are using the same one as me, mirror the CU. C/P and move her into position.
SELECTIONS - INVERT - DELETE - SELECTIONS - INVERT.
Duplicate the tube layer. ADJUST – BLUR – GAUSSIAN BLUR – RADIUS 25 - OK.
Change BLEND MODE of copy of tube layer to HARD LIGHT and leave original layer as normal.
(see tag for placement)
Lets do some more elements now:
Element 43 - C/P and move layer down over mask layer. Place at top left corner. Duplicate, mirror and flip.
(see tag for placement)
Element 97 - C/P over frame layer. Move to the top of frame.
(see tag for placement)
Element 20 - C/P and re-size 60%. Move to bottom right side of frame. Duplicate and mirror. Move into place.
(see tag for placement)
Element 78 - C/P and move to left side of frame. Duplicate and mirror. Move into place.
(see tag for placement)
Element 9 - C/P and re-size 60%. Move to bottom middle of frame.
(see tag for placement)
Element 95 - C/P and re-size 60%. Move to bottom middle of frame over element 9.
(see tag for placement)
Element 61 - C/P and re-size 80%. Move to fight side of frame layer over element 78. Duplicate and mirror. Move into place.
(see tag for placement)
Element 60 - C/P and move to right side in front of but to the left of element 61.
(see tag for placement)
Element 126 - C/P and move to top and a bit left. Duplicate and flip, then mirror and move up under original layer.
(see tag for placement)
Element 57 - C/P and re-size 50%. Move to bottom right side in front of element 60.
(see tag for placement)
Element 118 - C/P and re-size 60%. Move to bottom and to the right of element 57.
(see tag for placement)
Element 54 - C/P and re-size 60%. Move to bottom and to the left of element 60.
(see tag for placement)
Element 53 - C/P and re-size 60%. Move to bottom right in front of element 54.
(see tag for placement)
Element 55 - C/P and re-size 25%. Move to bottom right in front of element 60.
(see tag for placement)
Now for the tube(s):
If you are using the same tube as me, C/P the full size tube and move to bottom left corner of tag.
(see tag for placement)
Add drop shadow to layers of your choosing.
I used:
V & H 2
Opacity 70
Blur 7
Color Black
Now you can add name and © information. Save as .png and re-size if you wish.
I re-size before I save and add
name and © info.
Let me know what you think of
this tutorial.
Wednesday, 24 July 2013

*Right Click - Open Link In New Tab - On All
Images To View Full Size*
PTU Imagine Fairy
This tutorial was written by me
on July 24, 2013.
It was made out of my own
creation and any similarity is purely coincidental.
I used PSPx2 but any version
would work.
Artist: Rachel Anderson
You can find his tubes
at Creative Design Outlet HERE
Do not use this tube
unless you have a license.
Scrap Kit: Imagine by Amy Marie's Kits
You can buy this Exclusive kit at Amy Marie's Kits HERE
Mask: Masks by Lise 3 HERE
Font: Shit Happens Font HERE
Here goes:
Let’s start
with the mask layer:
New
Raster – 800 X 800.
Open PP22. Open mask and minimize.
SELECTIONS
– SELECT ALL – Copy and paste PP22 into selection.
Go to LAYERS –
NEW
MASK LAYER – FROM IMAGE – SOURCE LUMINANCE - CHECKED – from drop down menu, find Masks by Lise 3 – OK.
Duplicate and merge
down.
Let’s do the frame layer now:
Element 69 – C/P and leave it where it lands.
Grab your magic wand. Click
in the middle of frames.
SELECTIONS – MODIFY – EXPAND 2 PIXELS.
New Raster Layer. Move under frame layer. Open PP1.
Copy and paste into
selection.
Element 10 - C/P and leave where it lands behind frame.
(see tag for placements)
Now for some elements:
Element 48 – C/P and re-size 70%. Move to right bottom side of frame.
(see tag for placement)
Element 47 – C/P and re-size 70%. Mirror and move to bottom left side of frame.
(see tag for placement)
Element 5 – C/P and re-size 70%. Move to bottom right side of frame. Duplicate and mirror.
(see tag for placement)
Element 79 – C/P and re-size 60%. Move to bottom right side of frame.
(see tag for placement)
Element 54 – C/P and re-size 80%. Free rotate 30º right. Move to left side of frame.
(see tag for placement)
Element 25 – C/P and move to bottom middle of frame.
(see tag for placement)
Element 38 – C/P and re-size 40%. Move to bottom middle of frame over element 25.
(see tag for placement)
Element 28 – C/P and re-size 70%. Move to top right side of frame.
(see tag for placement)
Element 29 – C/P and re-size 70%. Mirror and move to left side of frame.
(see tag for placement)
Element 40 – C/P and re-size 60%. Mirror and move to very top left side of frame.
(see tag for placement)
Element 41 – C/P and re-size 60%. Move to very top right corner of frame.
(see tag for placement)
Element 4 – C/P and mirror. Move to middle left side of frame.
(see tag for placement)
Element 32 - C/P and re-size 70%. Move to middle right side of frame.
(see tag for placement)
Now the tube layer:
If you are using the same tube as
me,
C/P CU of tube as top most layer. Duplicate and move copy under frame layer. Highlight frame layer. Grab magic wand and click inside frame. Highlight copy of tube layer. Go to SELECTIONS - MODIFY - EXPAND 2 PIXELS - INVERT - DELETE - SELECTIONS - SELECT NONE. Highlight frame layer again. Grab magic wand again and click inside frame. Now highlight original tube layer. SELECTIONS - INVERT. Now grab the ERASER tool and erase parts of original tube layer you do not want showing. I also SELECTED element 25 and went to SELECTIONS - SELECT ALL - FLOAT - DE FLOAT - INVERT and erased more of the original tube layer. Did the same for element 5 and the copy of element 5.
(see tag for placement)
Add drop shadow to layers of your
choosing.
I used
V & H 2
Opacity 70
Blur 7
Color Black
Now you can add name
and © information. Save as .png and re-size if you wish.
I re-size before I save and add
name and © info.
Let me know what you think of
this tutorial.
Subscribe to:
Posts
(Atom)